Energy Suspension
energysuspension.com
Powerflex
powerflexusa.com


[GRM+ members read this article first. Subscribe and gain access to more exclusive content for only $3/month.]
Installing new suspension bushings is a very labor-intensive job, but one that will pay off with a more precise suspension and improved handling. Stock rubber bushings are biased toward ride comfort and vibration reduction. Replacing these components with ones made out of stiffer material, like polyurethane or Delrin, will result in better performance. Here’s a quick look at the steps involved.
[How to make your own Delrin and urethane bushings]
1. Remove Suspension Pieces:
We haven’t figured out how to clamp an entire car into our bench press, so the best bet is to start the process by removing the appropriate suspension component. Make sure you remember how it goes back together. Many suspension arms, bushing carriers and brackets are asymmetric. Labeling components with a permanent marker can help save time during reassembly.
2. Find a Suitable Mandrel:
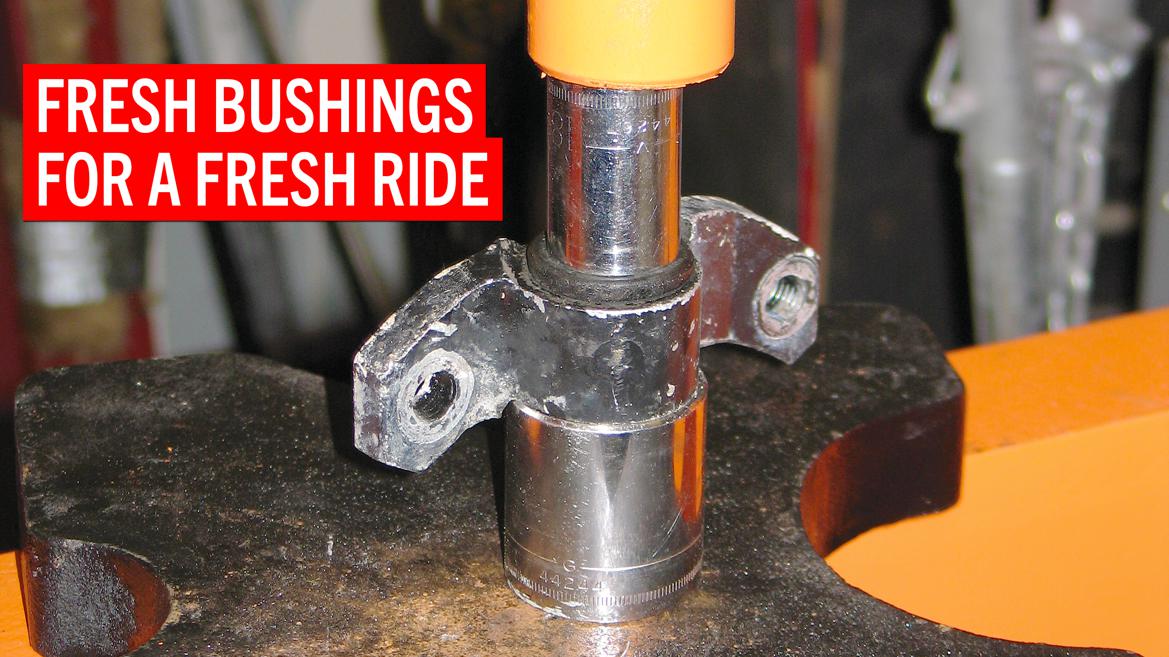
A mandrel is simply a shaft that is appropriately sized and strong enough to push the bushing from its resting place. We’ll use sockets of various sizes for this job. Typically speaking, a socket that is slightly smaller than the outer diameter of the bushing works well. A second, larger socket can be placed below the bushing to catch it.
3. Press:
Set the piece and the appropriate mandrel into the press and slowly start cranking the handle. Make sure that the whole shebang doesn’t get cocked sideways. Go slowly. Pressing exerts a lot of force, and a flying suspension arm or socket can do some damage to you, your garage or your project. Wear your safety gear.
4. Personal Lubrication:
There are quite a few opinions regarding the best lubricant for new aftermarket bushings. Rubber bushings do not require lubrication, but polyurethane or Delrin versions do. We typically stick with the silicone-based grease that is supplied with most kits. Energy Suspension’s grease is very sticky and doesn’t easily wash off, while the lube supplied with Powerflex bushings is very similar to copper-infused anti-seize coating. Both of these lubes will work well and last through at least one season of racing. You might have to periodically pull the pieces apart and relubricate, especially if the car is often driven in wet conditions.
5. Pre-Prep:
The lubricant should be liberally applied to the bushing as well as its housing. This step is a bit messy and due to its nature the lube doesn’t easily wash off. Wear gloves.
6. Two Halves at a Time:
Most replacement performance bushings consist of two halves plus a metal inner sleeve. Fit each bushing half into either side of the receptacle. This step shouldn’t involve the use of a press; if one is required, something is probably wrong.
7. Inner Strength:
The metal inner sleeve gives the bushing its strength and allows the pivoting bolt to correctly clamp down. Coat this steel sleeve with more lubricant and push it through each of the bushing halves. As you do this, make sure the bushing halves don’t slide out of their place.
8. Bolted Up:
Now you can bolt the part back to the car. The new bushings might make for a tight fit. If this is the case, try using a floor jack to hold the suspension part at its loaded position. Torque all fasteners as needed.
9. Check Your Nuts:
Once you’ve driven the car a few miles, recheck all of the fasteners. Is everything still properly torqued? Sometimes the settling of the car will loosen up fresh bushings to the point where they’ll start clunking.
10. Straighten Up:
After new bushings have been installed, you’ll need to get the car realigned. Once this is done, you should be good to go for many more miles.
In my opinion, properly supporting the part you're pressing is about 80% of the battle when pressing bushings if you already have a proper press to do it with. Often the control arm or subframe the bushing is attached to is awkward and doesn't have good square surfaces to react tons of force off of.
Also would like to note, if you can at all avoid having to burn out the bushings, it usually takes longer and makes an absolute mess of things.
In my experience, replacing bushings has involved a MAPP gas torch, hammer, a chisel or old screwdriver, and lots of swearing.
And if you are lucky, the chrome sockets you are using to press the bushing out or back in won't shatter into shrapnel.
Displaying 1-6 of 6 commentsView all comments on the GRM forums
You'll need to log in to post.