


Part 1: Preparation, Preparation, Preparation
Part 2: Creating a Perfect Surface for Final Paint
Part 3: Spraying Those Topcoats


What separates a good paint job from a great paint job? The prep work–which is really a euphemism for lots and lots of sanding.
At this point in the project, as seen in part 1, our E30-chassis BMW was looking good. We’d stripped the body to bare metal, removed the dents with some hammer and dolly work, and applied body filler where needed.
The car was rust-free, so we didn’t have to do any welding. (If your car needs welding, check out the Articles section of our website for tips.)
Now it was time to get the car ready for its blue topcoat. This process, simply described as priming, sanding and repeating until the bodywork is straight, is boring, tedious and probably takes more patience than artistry. But some skill is necessary, too, as modern paints offer a mirror finish that highlights a surface’s every imperfection.
Don’t worry, though: Since block sanding usually takes scores, if not hundreds, of hours, you’ll have plenty of time to hone that craft if you’re patient and persistent.
Before we jump to the step-by-step, it’s worth discussing where to source materials. There are two basic options: the friendly local paint shop and mail-order suppliers like Eastwood or Summit Racing.
A local business can be a great source of advice–best practices, best materials, and what to do when things go wrong. On the other hand, the national suppliers tend to offer a wider range of products and brands. Whatever route you choose, the bottom line is to source compatible materials that comply with appropriate regulations.
Now it’s time to move our E30 from bare metal and blotches of filler to a uniform gray primer base.

Our car looked pretty clean and straight once it was stripped to bare metal, but some door dings, rashes and other localized areas still called out for a thin application of body filler. After sanding the filler and using some 180-grit paper to feather the edges, we had our car ready for its first coats of primer.

If you’ve read our welding stories, you know our mantra: “You can’t weld dirt, oil or other contaminants.” Well, you can’t paint them, either, so we spent considerable time washing the car with a paint prep solvent. To do this, dip a sturdy paper towel in solvent and wipe down a section of the car. Then, use a fresh paper towel to wipe it dry. Repeat this process on each section until the drying towel remains completely clean.

You can also see that we masked off the car. While old newspapers can work, we prefer using real masking paper sourced from our paint supplier. Use a good brand of automotive masking tape to ensure that it sticks where it should and peels off when it needs to.
We love high-build urethane primer, which we mix with its catalyst according to the supplier-recommended ratios. Stir it for several minutes to ensure a thorough mix.

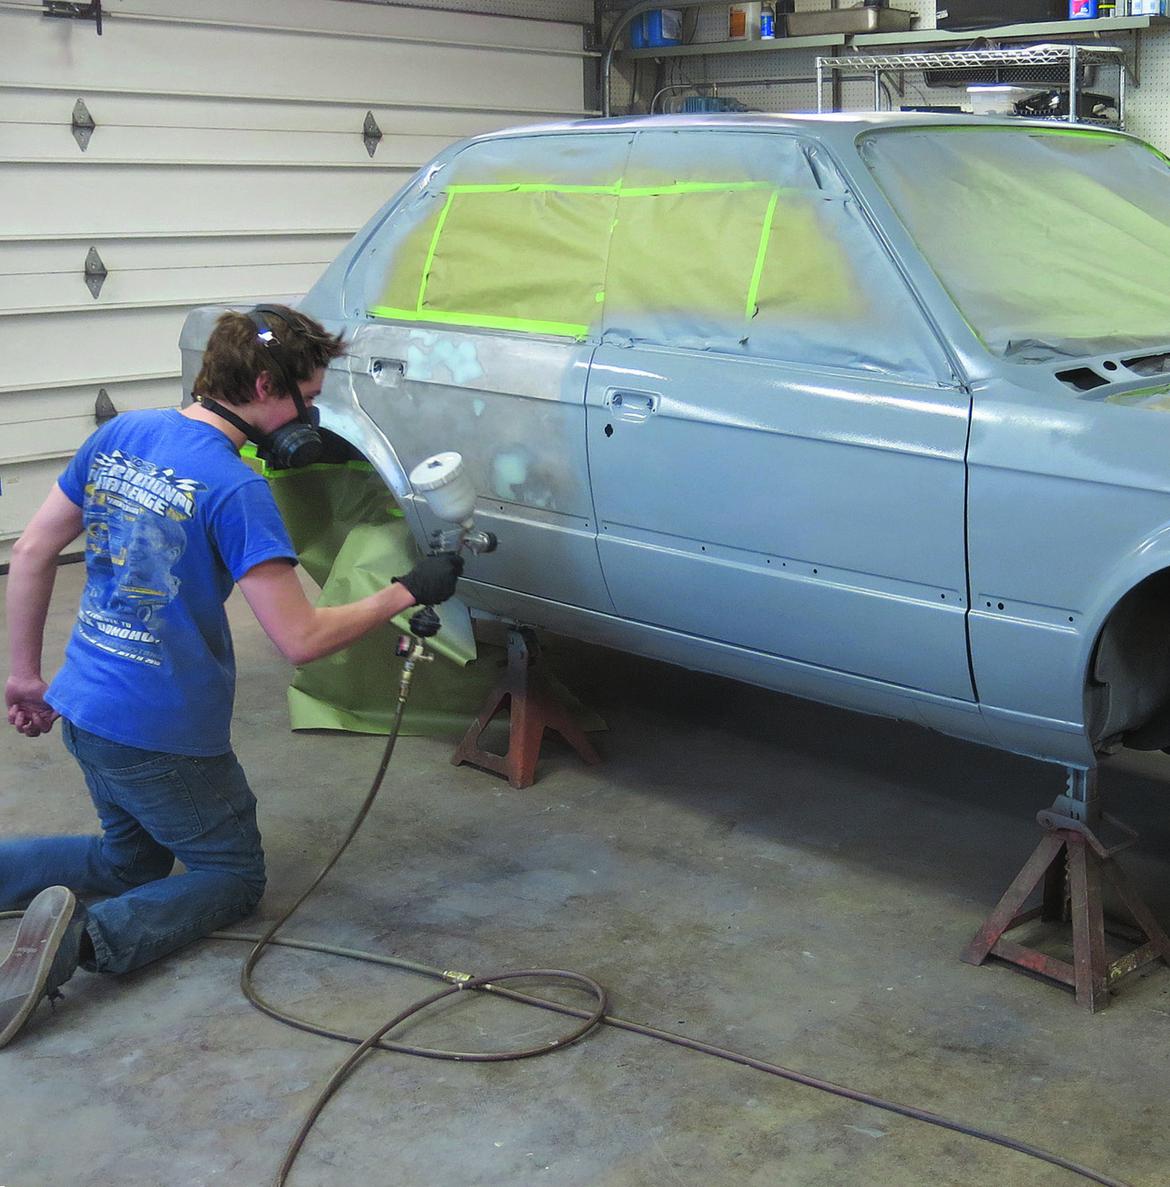
We used a $150 DeVilbiss high-volume, low-pressure spray gun that we set up for primer. If you’re on a tighter budget, we’ve seen good results from the inexpensive guns sold by discount suppliers. Note that even before the paint was atomized in the gun, we were already wearing a quality respirator to protect our lungs from the chemicals in the can.

Focusing on one panel at a time, we applied the first coat of primer, with each stroke halfway overlapping the previous one. We made this bottom layer fairly heavy, then followed with three or four slightly lighter coats.
Our “paint booth” was just our 24×30-foot home shop, cleaned thoroughly to keep dust out of the primer. Some people prefer to put up plastic walls for further protection, but we’ve found that moving the important stuff out of the garage and covering up any remaining items with plastic or old sheets works well–especially since the HVLP gun doesn’t produce much overspray. What isn’t pictured here is the big sparkless box fan we stuck in a window. With a service door slightly open, the fan moved the fumes outside.
Once the primer dried past its curing window, we started the block-sanding process. We’ve really grown to like Dura-Block sanders, which come in different lengths, shapes and degrees of flexibility. We used just two, a 12-incher and a 6-incher, and loaded them with 180-grit, sticky-back sandpaper.

Here is where patience and skill pay big dividends. As you sand, the primer will slightly change color to expose low spots in the body’s surface. Slowly sanding back the surrounding high spots will effectively bring up these low spots.

Of course, some of those low spots need to be filled. That’s when we break out the catalyzed glazing putty. It works just like body filler, but is finer and can be spread in very thin layers. We block-sand it, again starting with 80-grit and then moving to 180-grit.

Before the next coat of primer, whip out the paper towels and solvent and clean the car again.

Priming and block sanding is an iterative process. For the interim steps, we typically only spot-prime the low areas that need work.

When possible, we remove some body panels–like this front valance–and prime them while they’re off the car.

Here’s how the car looked after we primed about 25 percent of it. Once dry, the spot-primed area won’t look quite as obvious, but we’ll still know where we need to focus our block sanding.
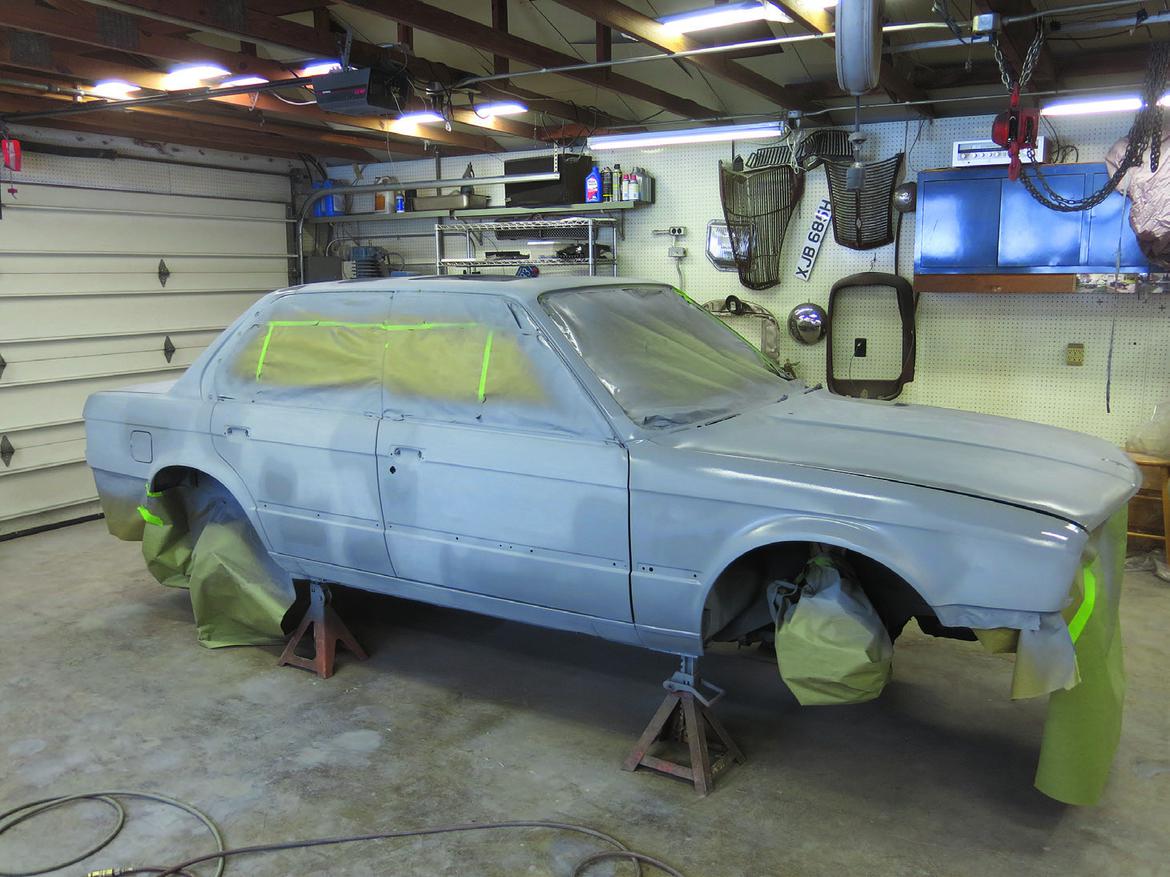
After several iterations of block sanding and spot priming, we primed the whole car one last time as a sealer before final paint. We usually put down two coats at this stage; if the directions allow it, we like to slightly thin the primer before applying it.

Block sanding got the car straight, but it still wasn’t ready for final paint. Time to grab some smaller sanding blocks and start wet-sanding the car, moving from 320-to 400- and finally 600-grit paper.
It’s still possible to mar your straight car with waves during this process, so take care to use sufficiently long blocks, crisscross your strokes, and (you guessed it) change your paper frequently to keep it sharp. For us, wet sanding is the messiest, least comfortable, and most tedious part of paint prep.

But it’s very satisfying when you’re done. Our primer was so smooth and straight that it almost shone.


A lot of work, but looking good! But watch the fingers when sanding. You can leave grooves from fingers if you are not careful.

no epoxy primer to start on the bare steel?

In reply to Rushcanuck :
Sometimes we do that, but this was a low-buck job.

I'd love to repaint my car myself, I just don't have a good place for it. My neighbors also wouldn't appreciate it ![]()

In reply to Azryael :
You might check your area for paint booths that you can rent.
Displaying 1-5 of 5 commentsView all comments on the GRM forums
You'll need to log in to post.


