Our BMW 435i? Yeah, it had an oiling issue. Specifically, braking would send the oil to the front of the pan–where the pickup wasn’t located. Oil pressure wasn’t dropping to zero, but it was getting lower than it should.
[Do we have an engine oiling problem with our BMW 435i?]
Of course, as soon as we confirmed we had a problem, we got with BimmerWorld: “Help us, Obi-Wan Clay-nobi.”
After all, James Clay and his BimmerWorld crew were influential in recommending this chassis and engine configuration to us, and they seem to know their stuff when it comes to BMWs, so clearly they wouldn’t be super enthusiastic about a car that was a ticking time bomb of doom, right?
The solution, they say, lies in borrowing some technology from a BMW factory race car from the recent past.
In 2014, BMW introduced the M235i Racing, a factory-built racer that stickered out well under $100K and was powered by the same N55 engine and ZF 8HP automatic transmission found in our 435i.
That car never really caught on in American racing, although there are still several examples running in the SRO TCX class to this day. But in Europe, the M235i Racing was a huge hit, and grids are still packed with them to this day. Teams still praise the car’s reliability and durability.
Even BimmerWorld had a couple of these cars back in the day, and Clay remembered their hardiness fondly: “We had two of the cars, and we’d put 60,000 race kilometers on them with zero engine issues before they were due for their mandatory factory inspections. They were still dynoing out like new engines when we sent them in.”
So what’s the secret? And, more importantly, how do we get some?
Yo Dawg, We Heard You Like Oil Pumps
The secret for our N55 oiling fix comes right off the BMW parts shelf in the form of an augmented oiling system that uses parts for the S55 engine found in the F8X-chassis M3 and M4.
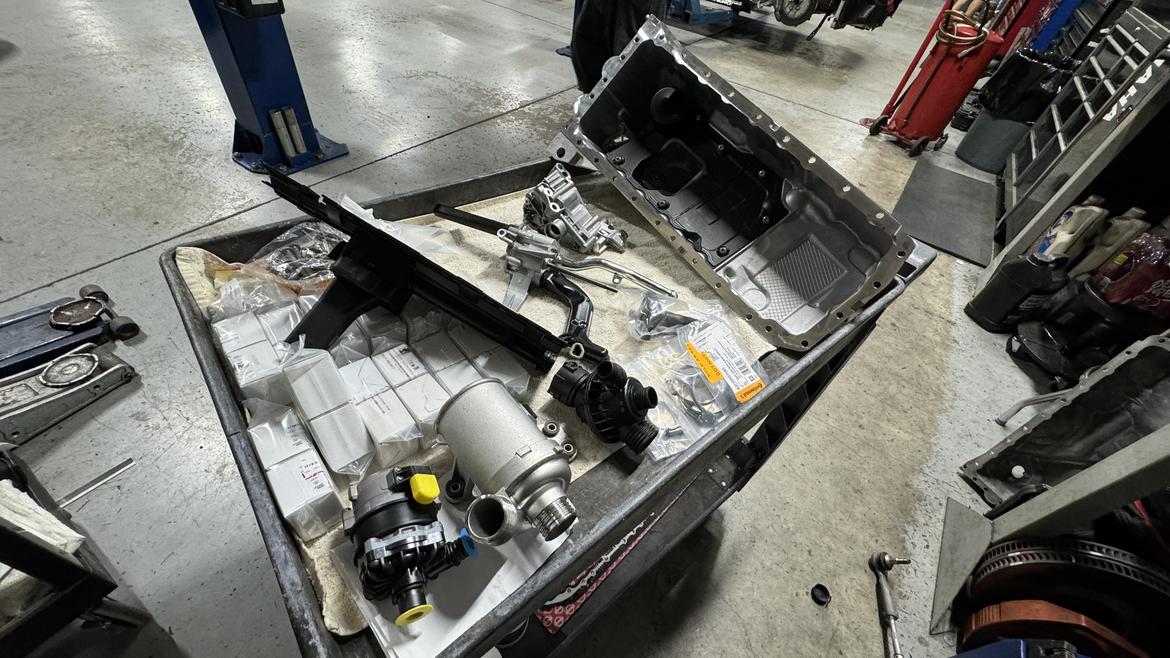
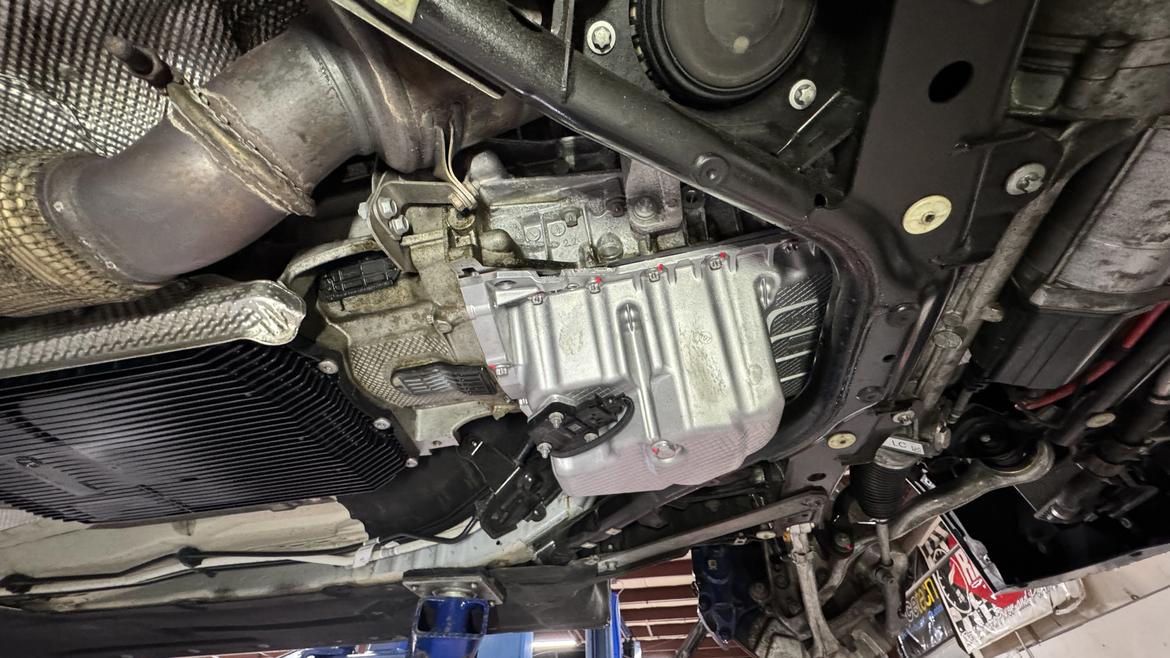
The heart of the system is a secondary oil pump, driven by a shaft from the main pump, that scavenges oil from three additional spots in the pan and then deposits that scavenged oil into the main well at the rear of the oil pan. This supplemental scavenge pump works in conjunction with an S55 oil pan, which has a slightly larger capacity than the original N55 pan and is also baffled to prevent the oil from sloshing forward under braking.
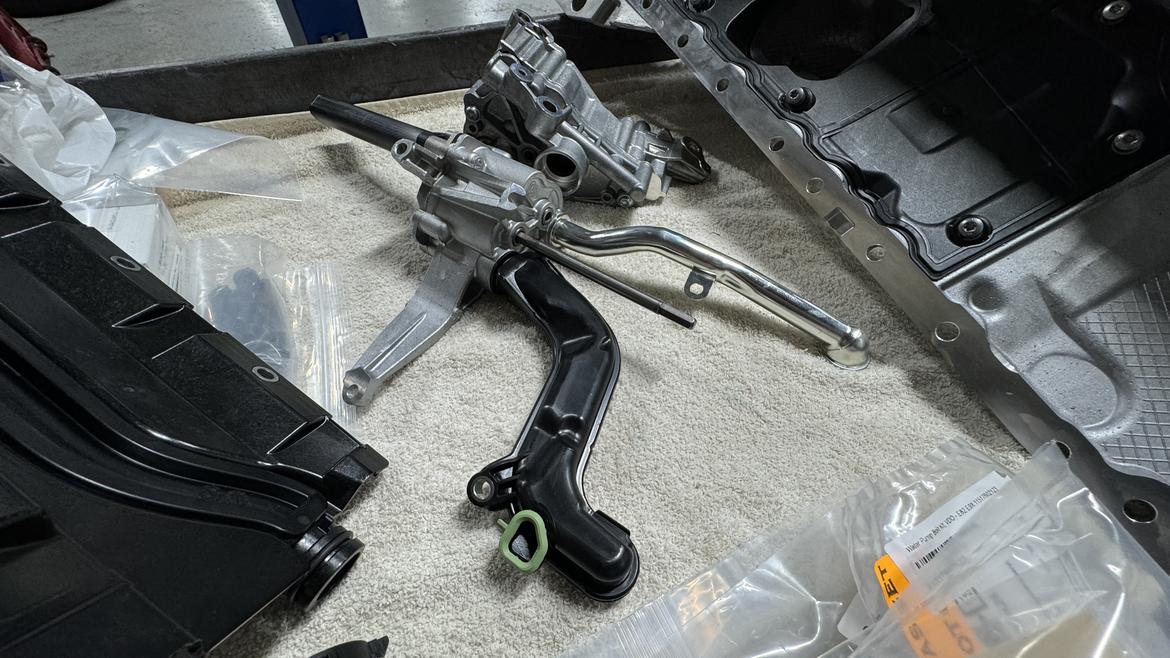
The system also uses an S55-specific windage tray that features an integrated pickup tube. The plumbing from the sump to the main oil pump is molded into this plastic tray, which also fits around the supplemental scavenge pump.
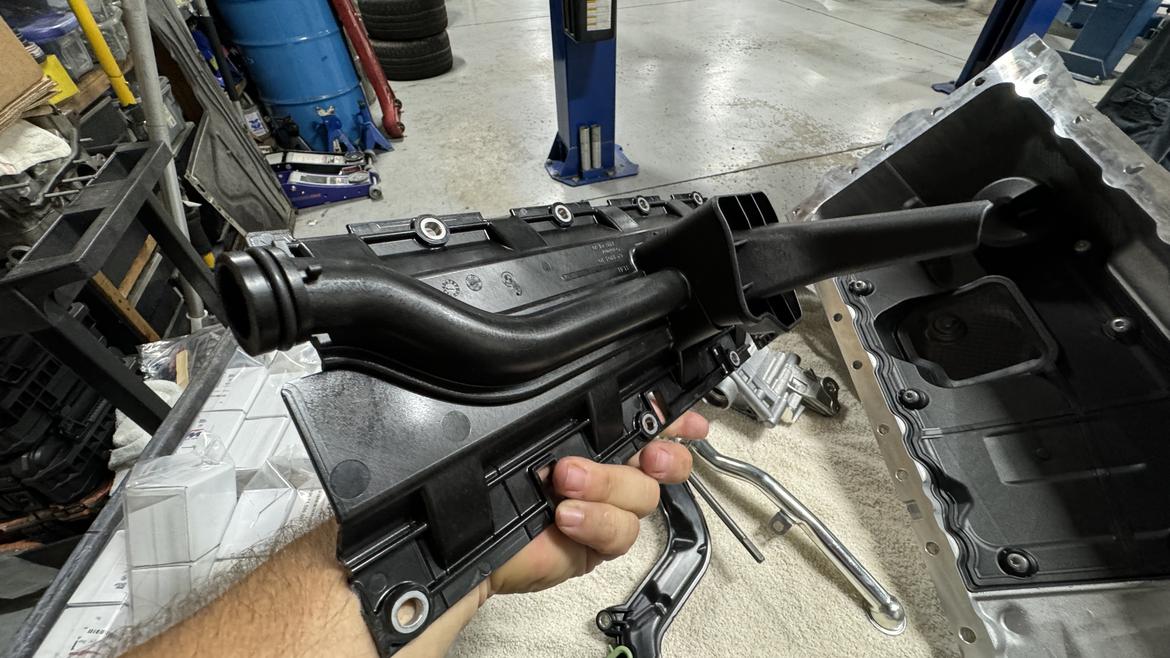
That scavenge pump has two pickups that extend forward to the front corners of the oil pan–the pan is also slightly dimpled to provide the necessary clearance–while a third pickup gets oil directly from the turbo drain. (In the stock N55 configuration, the turbo simply drains into the pan.)
But even though this S55-based system uses a separate scavenge pump, this isn’t really a dry sump setup. The main pump and pickup as well as this scavenge system are all still contained within the oil pan, and the whole system is barely visible from outside the engine.
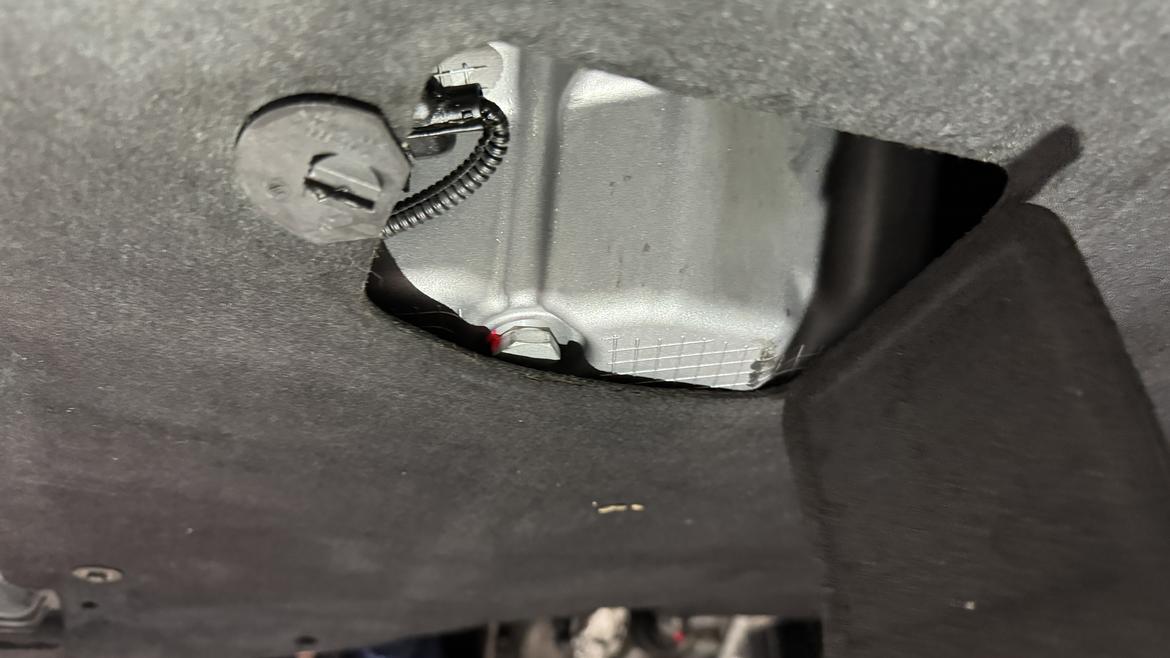
The pan for this “moist sump” system still fits around our car’s stock subframe, and the only slight issue is an oil drain plug that no longer perfectly aligns with the little trap door. As a result, you have to pull the entire lower cover for an oil change. Small price to pay.
While We’re in There
Ah yes, those four words that haunt every BMW owner’s psyche and credit card statement. BMWs are the grand world champions of stacked services due to some complex nature and tight packaging, so getting a couple of other tasks out of the way during our oil system adventure was also on the menu.
If we’re being honest, though, the whole root of this adventure was a leaky oil pan gasket. Our car had one when we purchased it.
See, to remove the oil pan gasket, you have to pull the front subframe, which is not something you want to do multiple times if you can avoid it.
And when you pull off the pan, you have to replace that plastic windage tray–and since they tend to get brittle with age, they can crack and chip.
And if you’re going to pull off that windage tray, you have easy access to the rod bearings–which can be a source of trouble on BMW inline-sixes–so why wouldn’t you check them while you’re right there?
And if you need to pull out the 73,000-mile rod bearings to check them, why would you put the same ones back in at that point?
It is a slope, and it is slippery with 10W-40 Red Line oil.
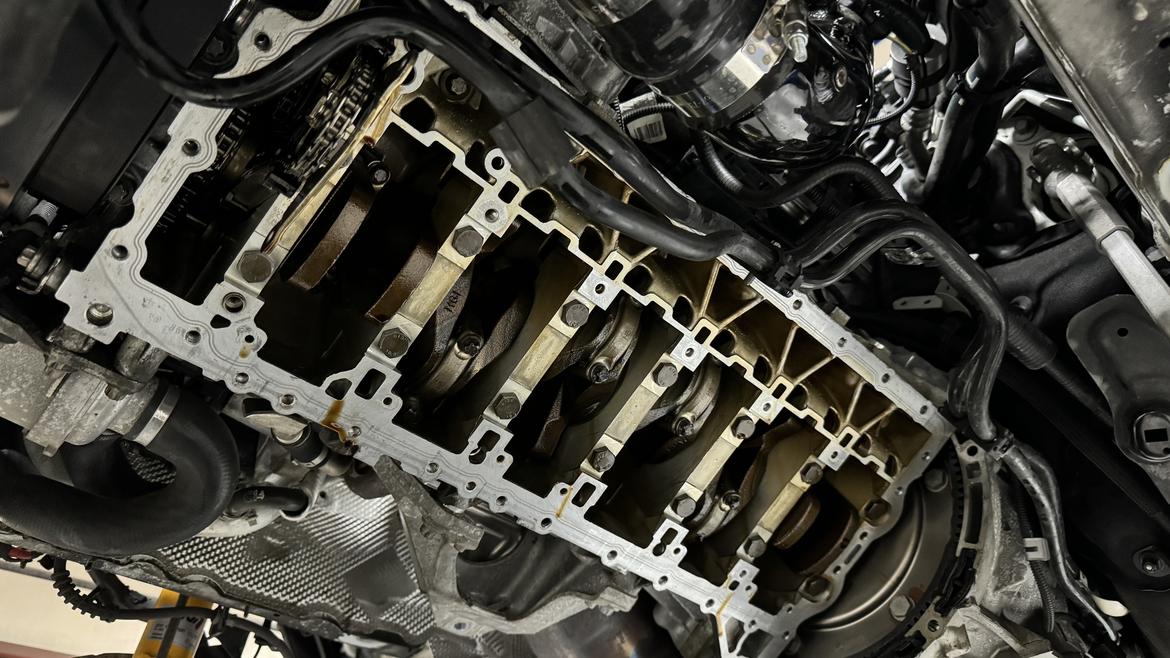
So yeah, while we were in there, we planned on replacing the rod bearings. Accessing the No. 1 bearing requires the removal of the oil pump, so these were all projects that didn’t compound the workload too badly.
N55 engines use one of two possible sets of rod bearings: blue or red. A letter on the crank’s front counterweight–either b or r–identifies the required replacement, so you’re not going to know which set will fit until you have the engine fairly well disassembled.
For this reason, BimmerWorld says it frequently sells both sets of bearings to customers and just takes back the unused set.
The set we used had also been treated by WPC with a surface prep that basically amounts to targeted micro shot-peening of the bearings. This physical process hardens the bearing surface while creating microscopic dimples that increase surface area and allow for additional oil retention on bearing surfaces. The process adds about 10% to the cost of the bearing set, but BimmerWorld reports far greater wear resistance from the treated bearings over the stock pieces.
As for the bearings we removed, they were … mostly fine? We didn’t find any alarming surface wear through the coating and down into the bearing shell, so that was nice.
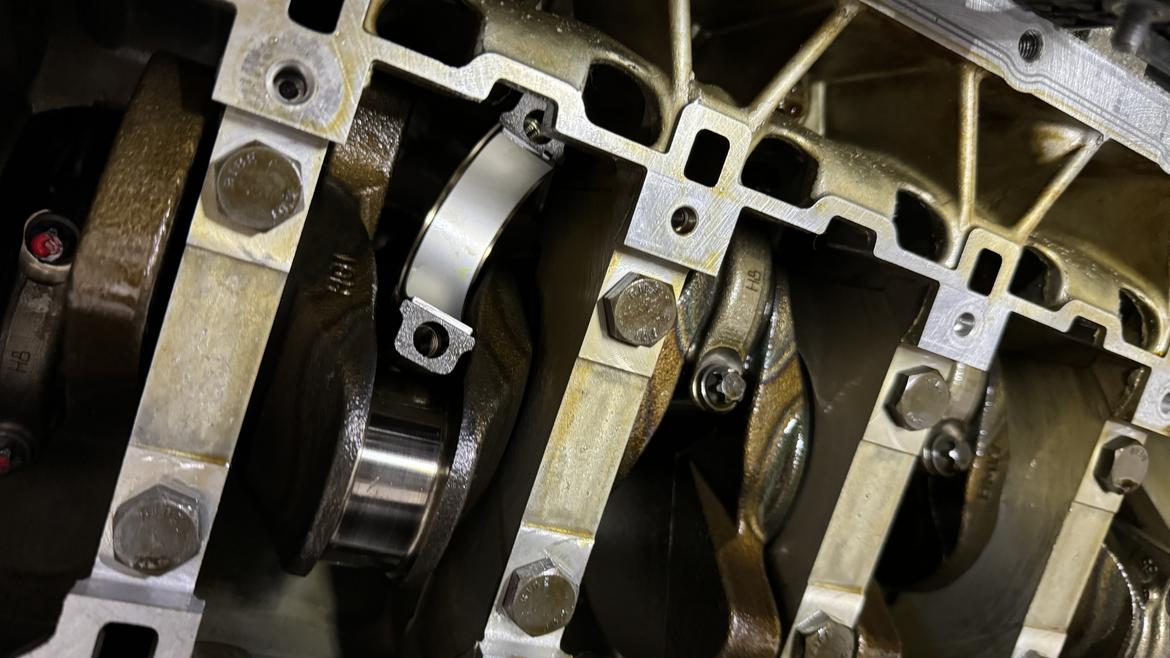
BimmerWorld’s Dave Simpkins, who turned most of the wrenches during this operation, noted that wear is more common on the No. 2 and No. 5 bearings, likely because these are the areas of highest crank flex. Our No. 2 and No. 5 bearings did show the most suspicious wear, but the wear was not entirely consistent with crank flex.
Instead, we had multiple streaks of light scoring on No. 2 and a single streak of heavier scoring–enough to feel with a fingernail–on No. 5. Neither bearing appeared to have any additional signs of heat or friction damage, but they did catch our eye. Additionally, the crank surface was still unflawed.
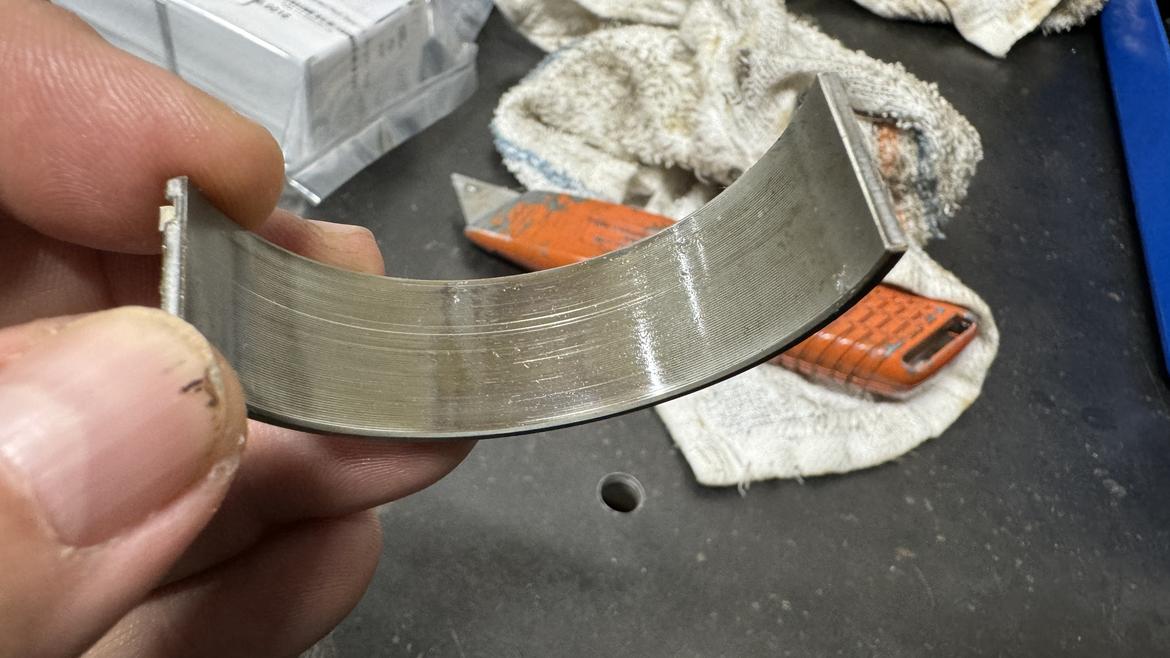
So, if this was some sort of foreign body intrusion, which it sure looked like, whatever got into the oil was harder than the bearing surface but softer than the crank. Phil Wurz used this as his teachable moment to stress the importance of frequent and regular oil changes and to bemoan how longer oil change intervals are trending in the industry. Point taken.
On to the Pump House
Installing the new oil pump is simply the reverse of the removal of the old one. They are essentially the same pumps, with the exception of the S55 model having a hex-drive port to accept the scavenge pump’s driveshaft.
But the removal of the pump is also probably the single biggest trap in the process. The pump is driven from the crankshaft by a chain that only operates this pump and is not shared with the cam drive chain. The good news there is that rotating the crankshaft to access various bearings does not throw off the engine timing. The bad news is that retaining tension on that oil pump drive chain during this process is of utmost importance–or you’ll find yourself doing a lot more disassembly to get the tensioning components back into place.
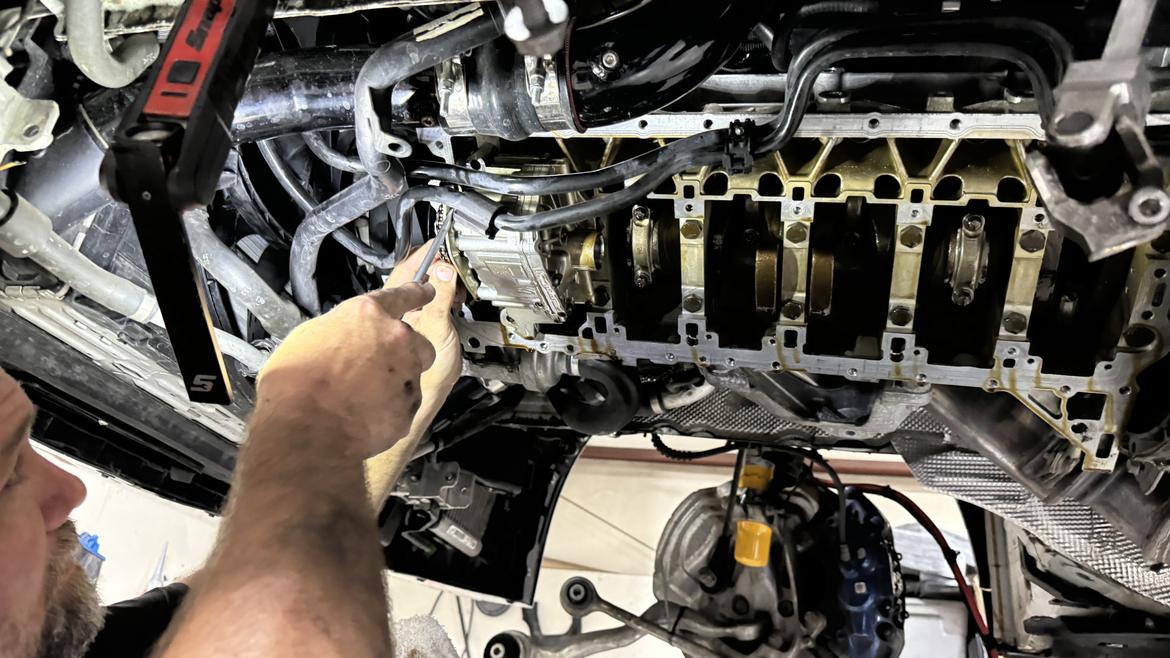
Simpkins avoided this problem by not removing the oil pump drive sprocket from the chain. The drive sprocket can be removed from the oil pump to facilitate pump removal, but removing the sprocket out of the chain allows the chain to slack enough that the tensioning pulley springs out of its housing behind the front cover. Then the swearing starts.
Luckily our drive sprocket showed no signs of wear–few will, actually, unless there’s some other problem afoot–and Simpkins was able to retain enough chain tension that losing our tensioner wasn’t an issue.
With the new windage tray and oil pump in place and the sprocket reconnected, it was then time to install the scavenge pump, inserting the driveshaft into the new main pump.
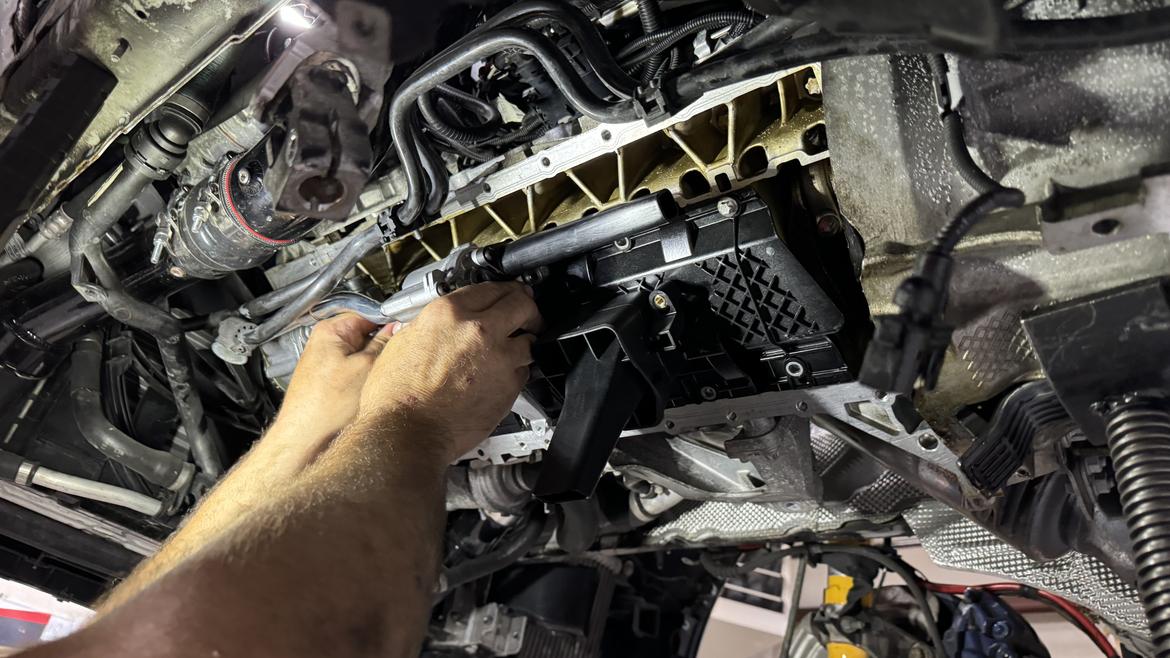
Everything bolts into place using existing holes in the N55 block, so no additional drilling or tapping is required anywhere in the process.
Torque to Me, Goose
What is required, however, are many new fasteners that must all be exactingly torqued. Nearly all the fasteners that you’ll remove during this procedure are aluminum and fit into an aluminum engine block. None are reusable.
BimmerWorld’s all-inclusive S55 oil pump upgrade kit includes all necessary fasteners as well as both pumps, the S55 windage tray, an oil pan gasket, an oil pump sprocket and a scavenge driveshaft. It retails for $1649.
The BimmerWorld crew does say to call before ordering, though, as they’re constantly tweaking the kit as they install more of them. They’re also happy to customize the setup for your particular plans as well. You’ll also need the $1100 S55 baffled oil pan with the proper wells to match the pickups on the new scavenge pump.
Anyway, back to all those fasteners that are included in this kit. Yeah, there’s a lot of those aluminum suckers, and all of them have a very specific torque-to-stretch specification. These fasteners are all torqued to an initial measured torque reading before a final pass is made. Then, the final torque is applied by rotating the fasteners to a specific angular value.
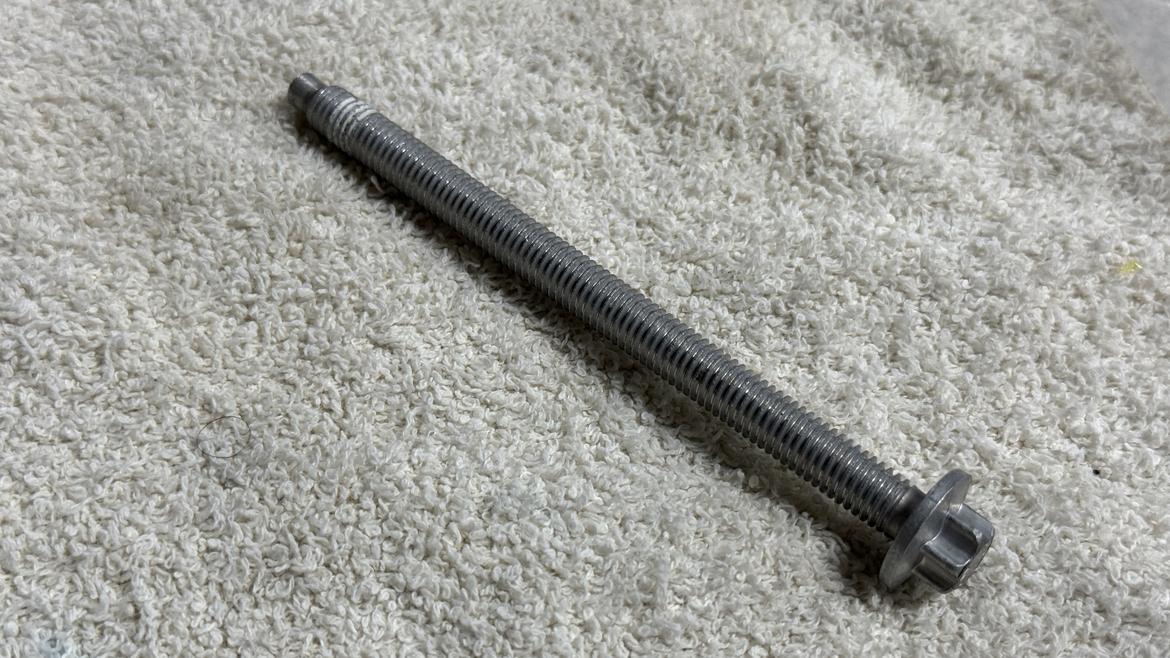
Simpkins first lubricates the fasteners with a very light dab of clean oil. Initial torque was applied with a digital torque wrench, then a Sharpie was used to mark each fastener with an index line. Then, a digital wrench was used to apply the correct angular rotation to each fastener, and the index line was used to visually confirm that final angular setting.
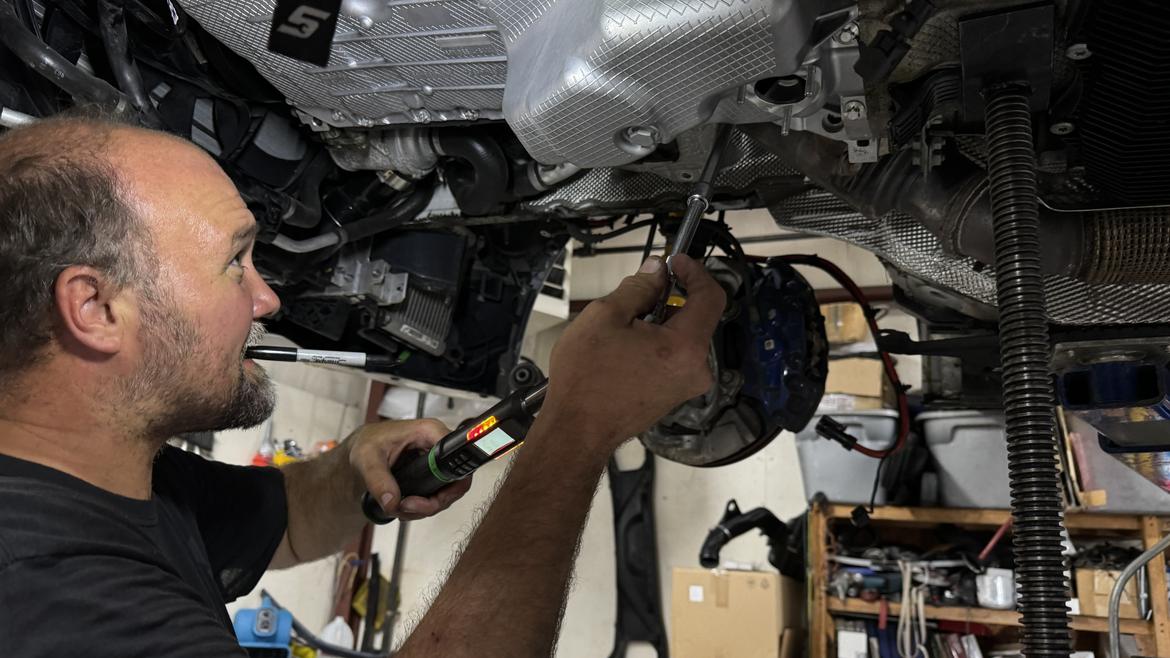
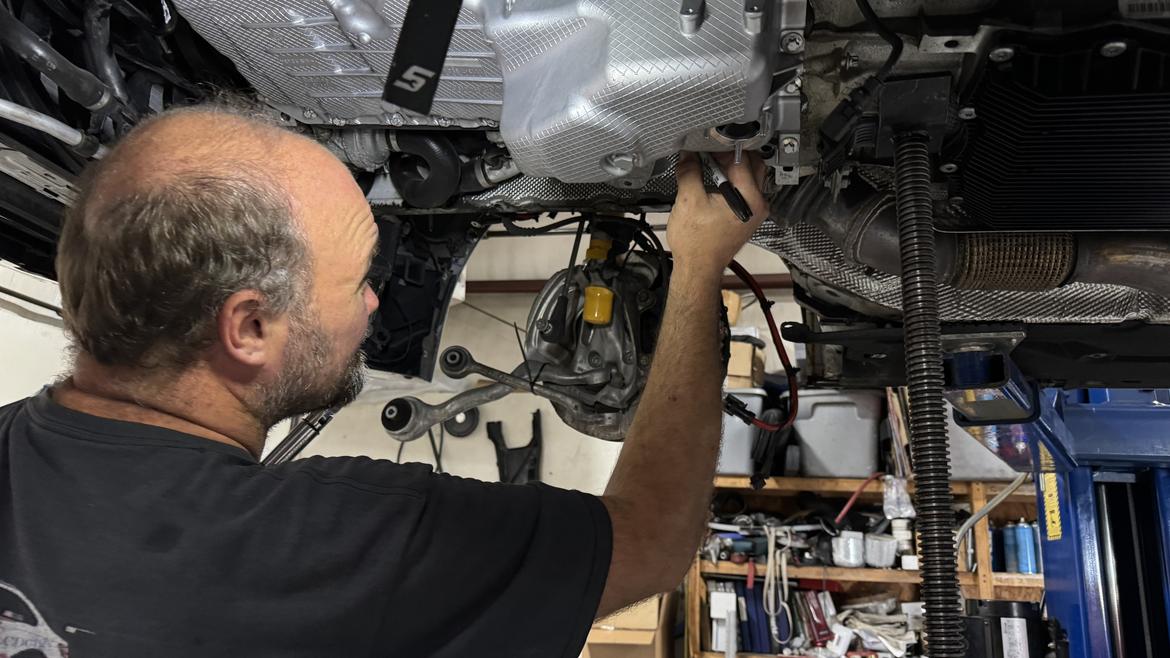
Simpkins finished off each fastener with a small dab of Cross Check Torque Seal to provide a visual reference of any fastener irregularities should we venture inside the engine again at some point.
Fill ’er Up
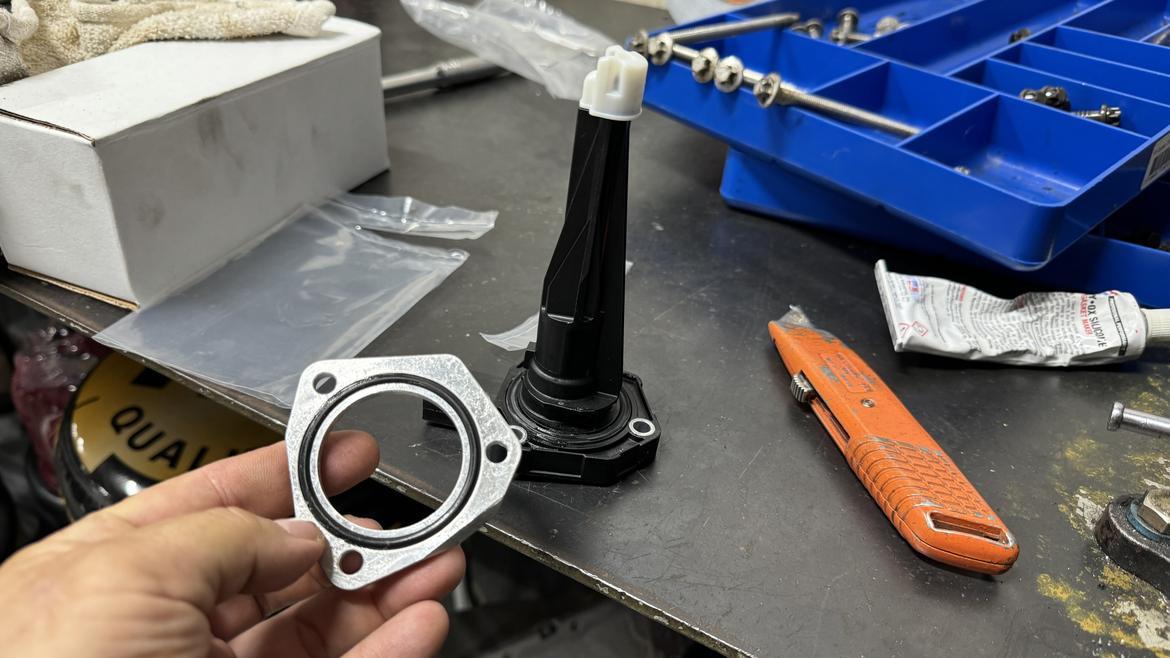
Once the pan was in place, the final addition was a revised oil level sensor to ensure we had the sump as full as possible. The new S55 pan is slightly deeper than the old N55 pan, so reinstalling the N55 oil level sensor would show a full sump before it was actually full.
To combat this, Wurz dug through the BMW parts bins and found the longest sensor he could. It was OE on many BMWs.
It’s so long, in fact, that in this instance it would hit the windage tray if it were just bolted in place. A small spacer is used so this sensor sits in the correct place.
We were able to get 6.5 liters of Red Line into the sump before the oil level indicator read 100%. While the S55 pan is deeper, a portion of the extra capacity is stolen back by the scavenge pump, which is about the size of an avocado–or maybe a mango. We started out with 6.25 liters on our refill and added 250 mL at a time until we got to 100% at 6.75 liters.
Worth It?
Uh, yeah.
Our first outing–barely 36 hours after the final fastener was tightened in Dublin, Virginia–was at our local track, Daytona International Speedway, with SCCA’s Track Night in America.
[How did our BMW 435i’s new oil-control measures work at Daytona?]
We knew Daytona would give our new oil system a workout, as this track features at least two seriously hard-braking events from 140-plus mph as well as a couple of other hard-braking sections in the infield.
“But wait,” you say, “don’t those new bearings require a break-in period?”
“I really wouldn't worry about break-in from a camshaft or lifter or spring install from the top-end of the engines. If I installed cams or springs, I'd be comfortable beating on the car immediately,” Phil Wurz explains. “Rings are really the thing that make a meaningful difference to longevity/performance.”
So send it we did.
And our data showed no dips below about 50 psi at any point during our laps. Not only did pressure stay good, but oil temp never rose above about 265° on a day where ambient temps were in the high 90s.
For the critics who say, “Well, this certainly isn’t a cheap or easy fix,” we’d counter with, “You’re right.”
Not every fix is cheap or easy, but based on initial testing and legacy data from those M235iR race cars, it does appear to be thorough and complete.
Or you could look at prices for new engines. Current auctions show M235i- or 435i-spec N55 engines selling on the used market for $5000 to $6000. And these are engines with north of 100,000 miles.
Want to spend less yet still more than we spent on our oil system retrofit? You could look at the lower-powered N55 engines that fit into BMW’s lineup. These engines use the same long block but receive different ancillary parts and tuning.
We feel that our efforts and expenses went toward reliability and longevity, which is fairly invaluable in a dual-duty car that you’re expecting to get to work on the Monday after a track weekend.
Besides, we were in there anyway.
More Like This
Comments
Not shockingly, I just started following this build after picking up a new-to-me N55 powered 2018 M2. Great articles!
This looked like one hell of a job. I heard that the N55 powered M2's (2016-2018) came with the/this same oiling system as the S55 powered cars. Any idea if that's true?
Add an oil pump to your oil pump. Somehow, that is very German.
Noddaz said:
Add an oil pump to your oil pump. Somehow, that is very German.
Xzibit approves
Allan
New Reader
12/7/24 9:15 a.m.
In reply to roninsoldier83 :
That is true, M2 got this from the factory
JG Pasterjak said:
Noddaz said:
Add an oil pump to your oil pump. Somehow, that is very German.
Xzibit approves
Yo dawg, we heard you like oil pumps...
In reply to Pete. (l33t FS) :
Quick, someone make the meme.
Displaying 1-6 of 6 commentsView all comments on the GRM forums
You'll need to log in to post.


